Boa parte do que aprendi da W16 e da Canyon foi tirado do site abaixo:
http://www.cagiva-club.com/forum/
O ruim é que a maioria da coisas são em tcheco, mas o google resolve isso pra gnt. Tem a parte internacional tb, mas tem pouca coisa
http://www.cagiva-club.com/forum/index.php?board=16.0
Os links abaixo são de dicas postadas nesse site, bem legal
http://www.cagiva-club.com/index.php/tipy-a-triky
http://www.cagiva-club.com/forum/index.php?board=30.0
Por sorte, o post q eu fiz sobre a troca da corrente de comando eu não postei o link, mas sim copiei tudo, pois o link não mais possui as fotos, só texto
http://www.cagiva-club.com/forum/index.php?topic=1669.20;wap2
O bom desse site é que agora que tenho a Elefant900, tem muitas coisas legais tb, mas como a minha deu pouquissimos problemas, não preciso mais fuçar tanta atras de informação.
Só lembrando, quem tiver algo a contribuir, favor me mandar o link que eu posto aqui, assim a gnt se ajuda já q é tão dificil conseguir algumas coisas.
terça-feira, 29 de janeiro de 2013
terça-feira, 9 de agosto de 2011
Ajuste de Valvulas
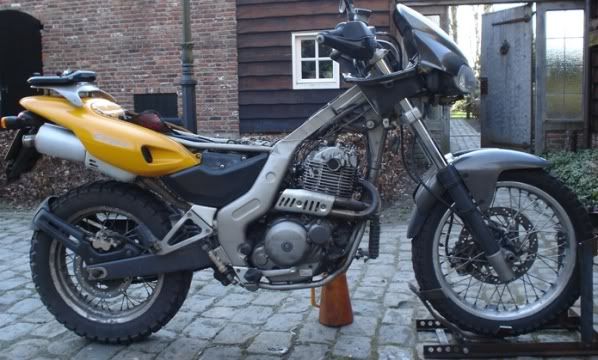
As Cagivas W16 e Canyon 500/600 fazem um barulho bem particular, quem não conhece acha que tem arruelas e porcas soltas no motor, mas o motor é barulhento por natureza, ja me acostumei. Mas devemos tomar cuidado com barulhos que alertam para reais problemas.
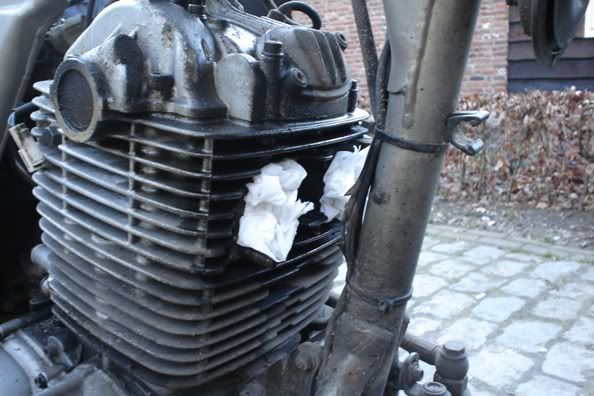
A minha começou a fazer um barulho bem peculiar, um tic tic tic tic tic tic tic tic tic tic tic tic que aumentava conforme o motor esquentava, resolvi regular as valvulas e ver se o barulho sumia.
Nossas Cagivas trabalham com 4 valvulas (2 admissão e 2 escape). As valvulas de admissão devem ser reguladas com folga de 0.05mm e as de escape com 0.1mm (dados retirados do manual).
Para isso basta abrir as tampas de valvulas e regular a folga utilizando um jogo de calibre de valvulas, utilizando-se da técnica "passa num passa".

Após a regulagem, o barulho sumiu quase que por completo. Fui trabalhar com a moto (40km ida e volta) e a moto aparentemente esta esquentando menos, segundo meu pai, pode ser que ela faça melhores medias de consumo. Assim que eu tiver essas informações eu posto aqui. A minha já acho economica (20km/L cidade e 22km/L em viagens).
quinta-feira, 28 de julho de 2011
Tutorial - Troca de corrente de comando Canyon
peguei de um forum gringo, esta em ingles, mas pode ajudar, me ajudou na troca dos discos de embreagem tb.
Remove the engine guard.
Drain the oil. (when engine is warm)
Remove the seat, the tank fairing, the fuel pipes and the fuel tank.
Remove the exhaust pipes and the spark plug.
Remove the top engine bracket.
Remove the 2 cylinder head covers.
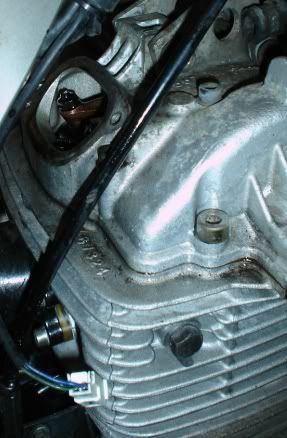
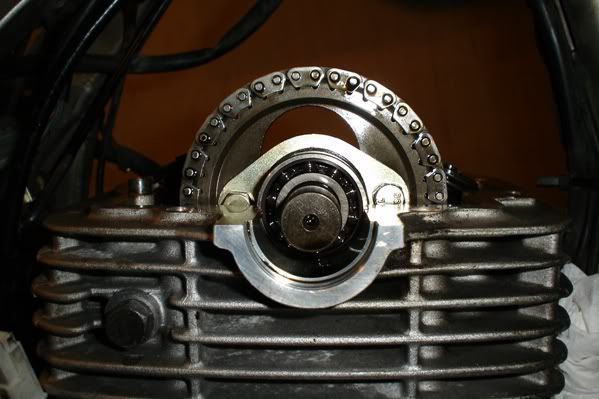
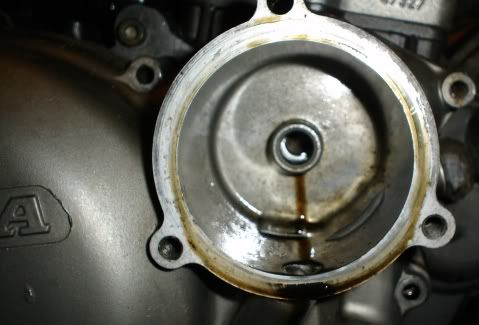
Now you have to put your engine at the right timing. This has to be the TDC ( Top Dead Centre) from the compression stroke. Through the little window on your left crankcasecover you can see the timemarks on the flywheel. You have to put your engine on the ‘A’ mark and make sure it is in the compression stroke. In the compression stroke the valves don’t move, around the ‘A’ mark timingpoint.
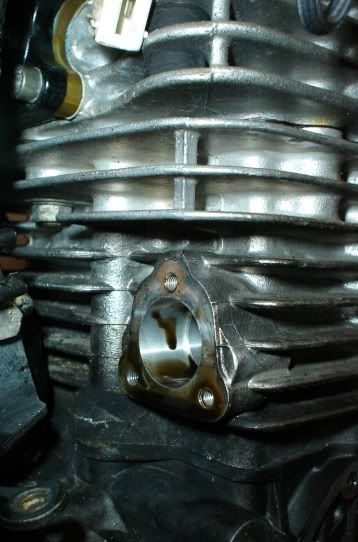
Remove the screws from the cylinder head, including the 2 screws underneath the cylinderheadcovers. You can remove the cylinder head and get to the camchain with the sprocket.

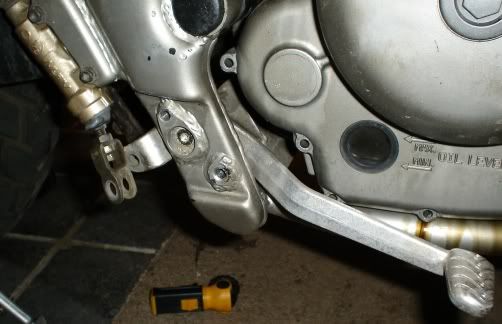
Loosen the rear brake pedal, so you be able to remove the right crankcasecover.
Remove the oilfilter, at the end we need to install a new oil filter with new oil.
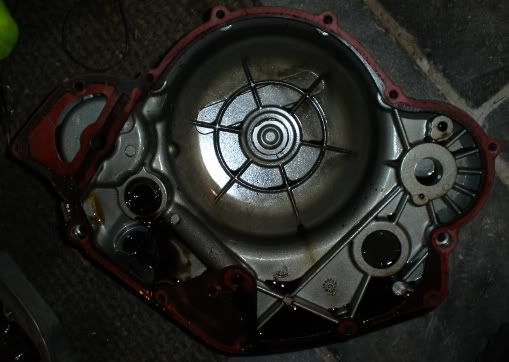
Loosen the screws on the right crankcasecover and remove the cover.
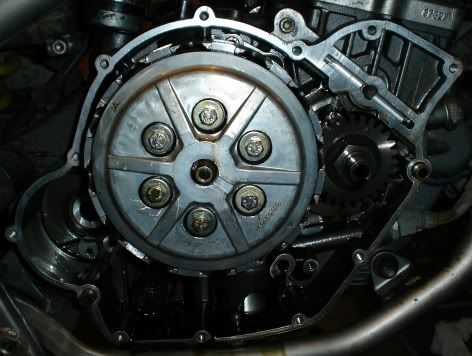
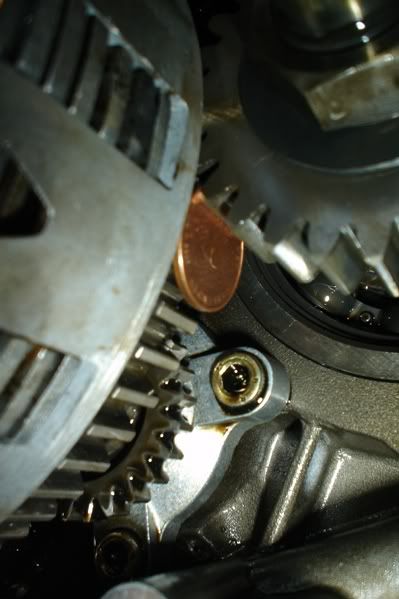
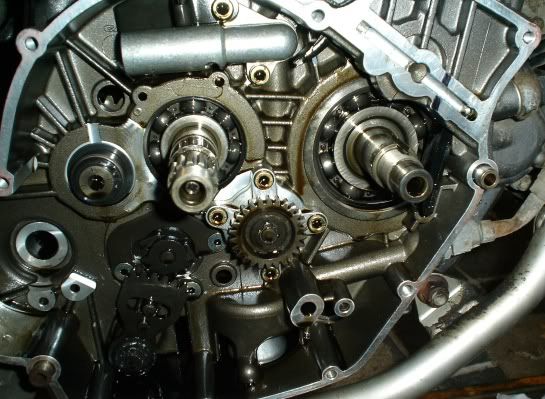
Now it is time to remove the bolt from the crankshaft, this bolt has a left-handed thread.
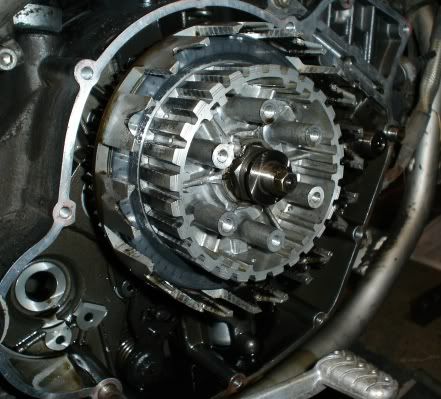
To loosen this bolt you need to block the sprocket on the crankshaft. You can block it by putting a 5-eurocent coin between the teeth of the crankshaftsprocket and the clutchsprocket.
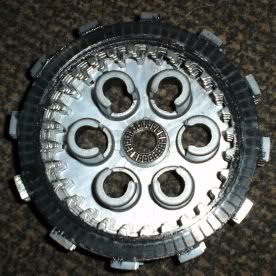
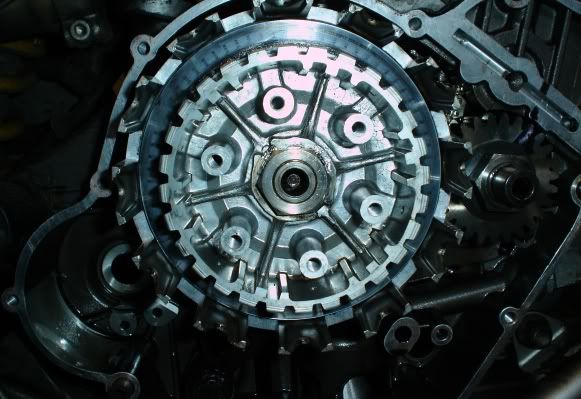
The clutch and the clutchhousing need to be removed, otherwise you can’t remove the camchainsprocket from the crankshaft. Remove the screws and the springs, now you remove the pressure plate and the discs.
Remove the thrust bearing
Remove the engine guard.
Drain the oil. (when engine is warm)
Remove the seat, the tank fairing, the fuel pipes and the fuel tank.
Remove the exhaust pipes and the spark plug.
Remove the top engine bracket.
Remove the 2 cylinder head covers.
Now you have to put your engine at the right timing. This has to be the TDC ( Top Dead Centre) from the compression stroke. Through the little window on your left crankcasecover you can see the timemarks on the flywheel. You have to put your engine on the ‘A’ mark and make sure it is in the compression stroke. In the compression stroke the valves don’t move, around the ‘A’ mark timingpoint.
Remove the screws from the cylinder head, including the 2 screws underneath the cylinderheadcovers. You can remove the cylinder head and get to the camchain with the sprocket.
Loosen the rear brake pedal, so you be able to remove the right crankcasecover.
Remove the oilfilter, at the end we need to install a new oil filter with new oil.
Loosen the screws on the right crankcasecover and remove the cover.
Now it is time to remove the bolt from the crankshaft, this bolt has a left-handed thread.
To loosen this bolt you need to block the sprocket on the crankshaft. You can block it by putting a 5-eurocent coin between the teeth of the crankshaftsprocket and the clutchsprocket.
The clutch and the clutchhousing need to be removed, otherwise you can’t remove the camchainsprocket from the crankshaft. Remove the screws and the springs, now you remove the pressure plate and the discs.
Remove the thrust bearing
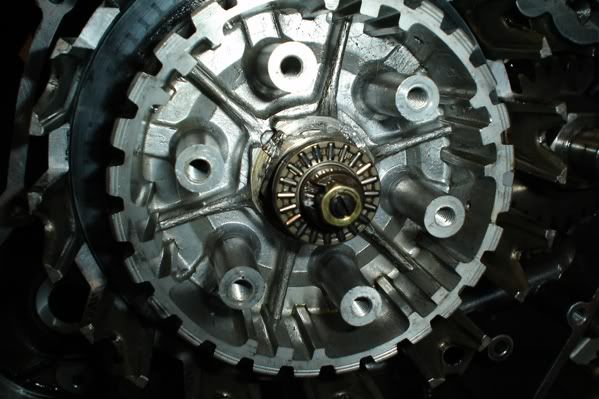
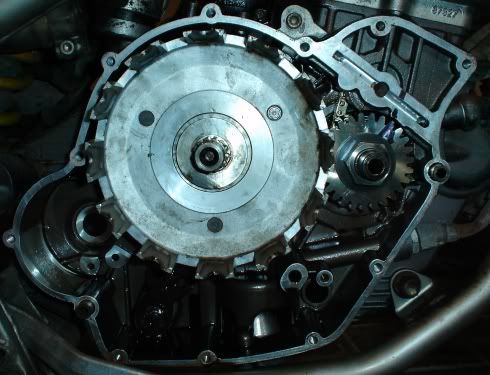
Remove the secured bolt. Now you can remove the clutchhousing.
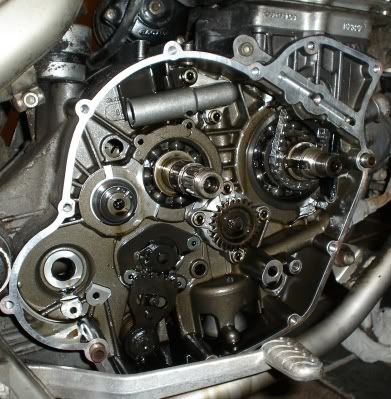
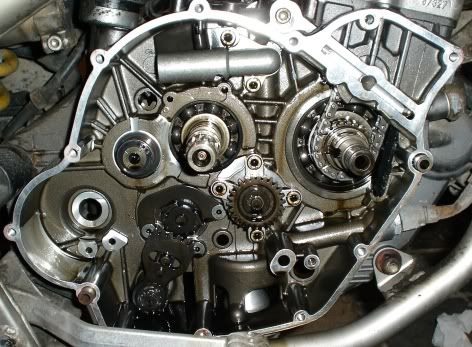
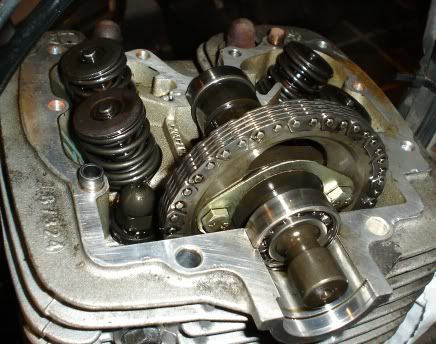
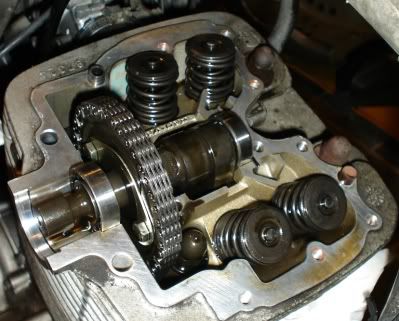
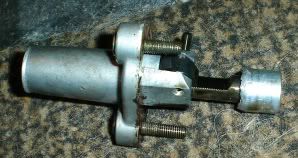
Remove the camchaintensioner, first loosen the large centre bolt and later the smaller bolts. When you remove the tensioner you can see how many teeth the tensioner is out.
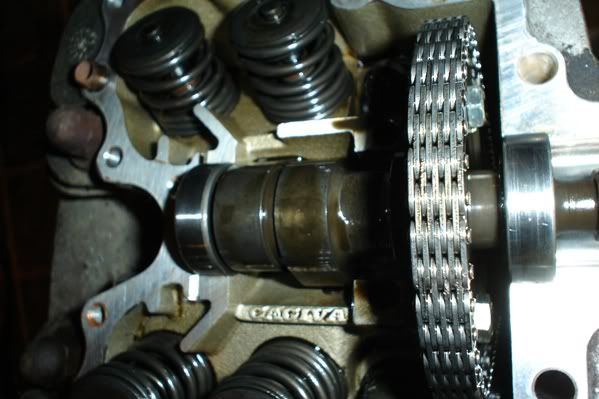
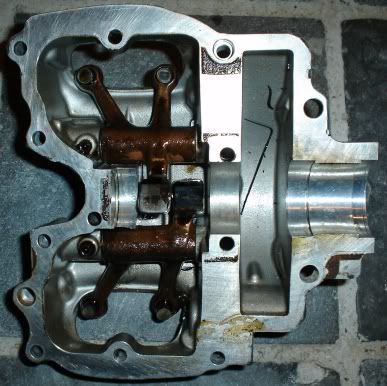
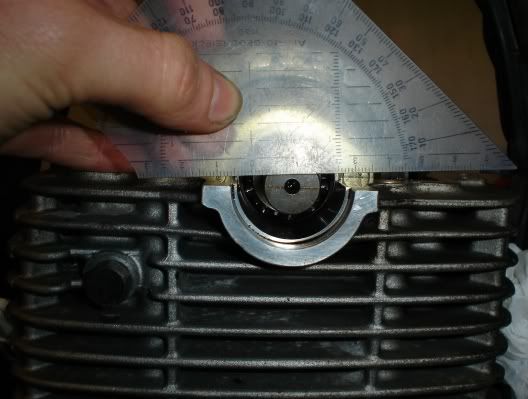
Check the timing of the engine, make sure the crankshaft is still on the ‘A’ mark (the TDC of the compression stroke) The Sprockets on the crankshaft are positioned with a cotter so you can’t install the sprockets in a wrong way on the crankshaft. But now you have to mark het timing on the camshaft to make sure your timing does not change compared with crankshaft. The cams have to point down.
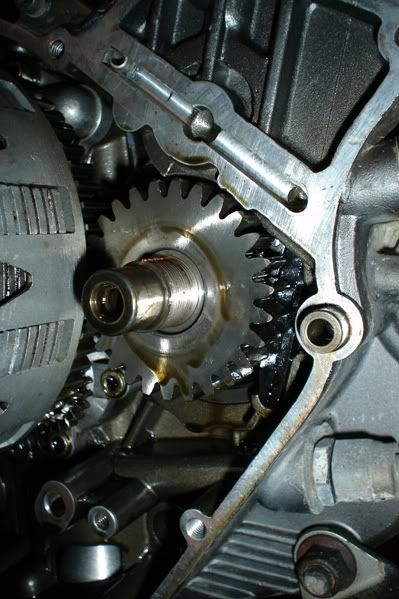
Remove the 2 bolts from the camchainsprocket, they are secured.
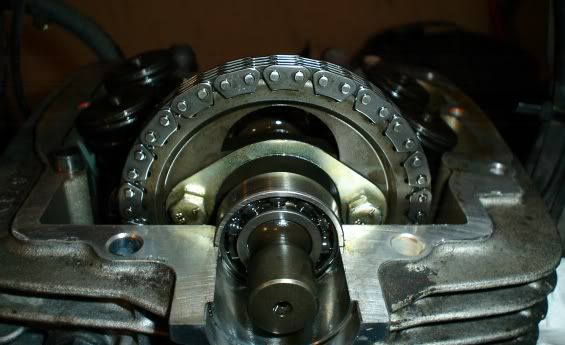
Remove the sprocket from the notch on the camchain. The sprocket can now move down. The chain is free now and you can remove the cotter from the crankshaftsprocket and remove the sprocket from the crankshaft.
Remove the camchaintensioner, first loosen the large centre bolt and later the smaller bolts. When you remove the tensioner you can see how many teeth the tensioner is out.
Check the timing of the engine, make sure the crankshaft is still on the ‘A’ mark (the TDC of the compression stroke) The Sprockets on the crankshaft are positioned with a cotter so you can’t install the sprockets in a wrong way on the crankshaft. But now you have to mark het timing on the camshaft to make sure your timing does not change compared with crankshaft. The cams have to point down.
Remove the 2 bolts from the camchainsprocket, they are secured.
Remove the sprocket from the notch on the camchain. The sprocket can now move down. The chain is free now and you can remove the cotter from the crankshaftsprocket and remove the sprocket from the crankshaft.
Now you can take out the camchain and remove the camchainsprocket and the chain.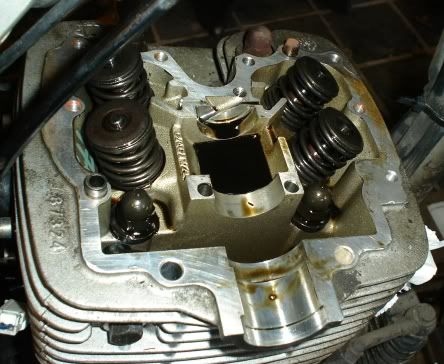 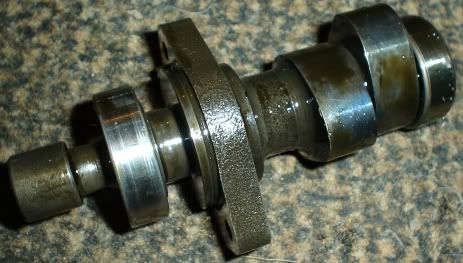 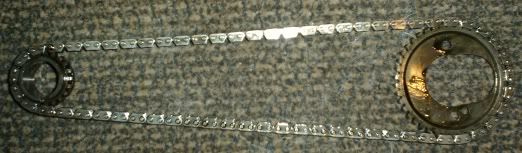 Install the new sprocket on the crankshaft and put the new chain on it. Put the camshaft back in with the camchainsprocket free on it, put the chain on the sprocket. Put the sprocket on the notch from the camshaft and make sure the marks are on the right place. Check the timing!!! Tighten the bolts back in and secure them. Check the crankshaft timing (A-mark on flywheel) and make sure the camshaft timing corresponds with it. Let the engine make some rotations by hand and check the timing again. 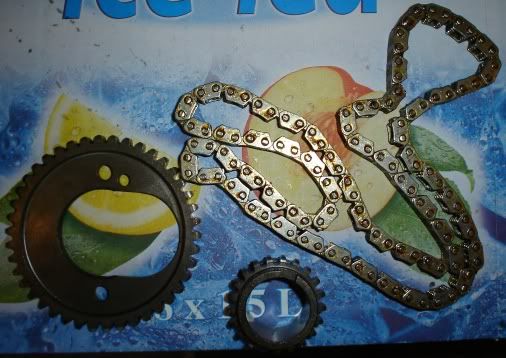 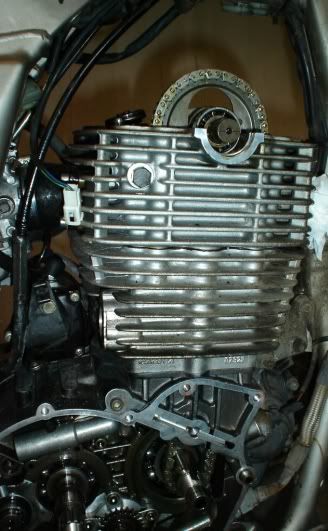 When everything is ok, you can put the other crankshaftsprocket back on and put the clutch back in. With help of the 5-eurocent coin you can tighten the bolt back. 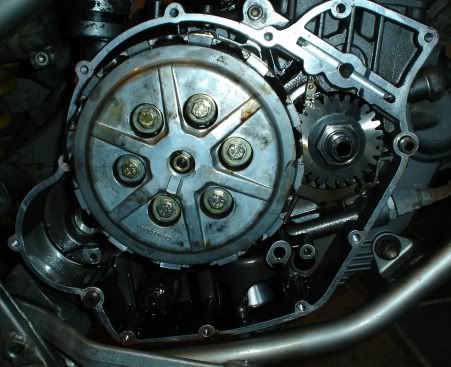 You can put back the cylinder head, but First clean the surfaces. I used the gasket maker ‘Dirko from Elring’ 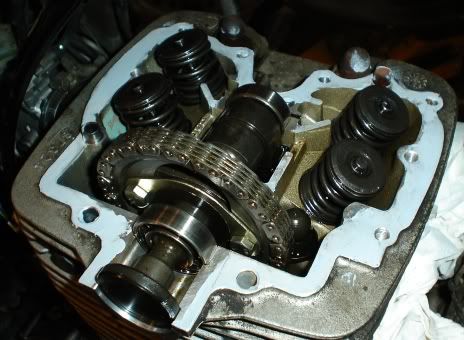  Install the right crankcasecover and the camchaintensioner. Use new gaskets. 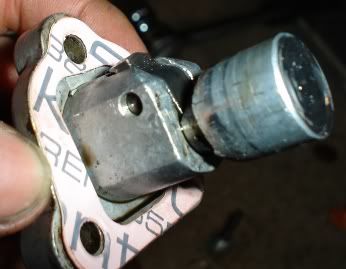 Check the valve clearance and adjust it. (clearance between 0.05 and 0.10) Clean the sieve above the oil drain bolt. Install a new oilfilter and put new oil on your bike. 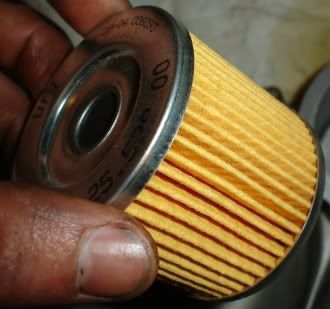 Install the cylinder head covers, the top engine bracket, brake pedal, exhaust pipes and all the other components on your bike. Let your engine rotate by hand first, to check on strange enginenoises. Ready to start the engine. | |
terça-feira, 26 de julho de 2011
Dicas - Cabos do Motor de Arranque
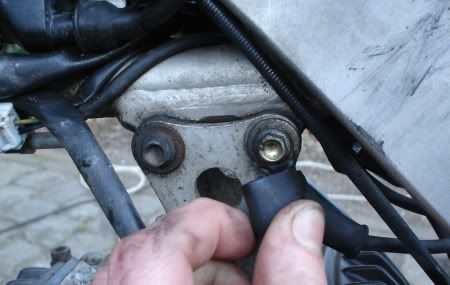
Quando minha moto estava com problemas de partida, eu notei que no momento em que eu acionava a partida, os cabos do positivo que vai para o rele de partida e do rele até o motor de arranque, esquentavam bastante. Sei que isso é ocasionado devdo ao caminho mal dimensionado da corrente da bateria até o motor de arranque.
Solução: Comprei os cabos respectivos mais o negativo que é ligado na carcaça do quadro da Honda Falcon e os montei em paralelo, assim não tive mais problemas com aquecimento dos cabos. Talvez isso tenha ajudado na partida pois a energia perdida no aquecimento dos cabos não era mais perdida.
Solução: Comprei os cabos respectivos mais o negativo que é ligado na carcaça do quadro da Honda Falcon e os montei em paralelo, assim não tive mais problemas com aquecimento dos cabos. Talvez isso tenha ajudado na partida pois a energia perdida no aquecimento dos cabos não era mais perdida.
Dicas - Regulador de Tensão/Voltagem
O regulador original da W16 funciona com a tensão de saida de 12~12.5 Volts (era assim com o meu), por isso que muitos reclamam de problemas de partida. Apos dica do meu mecânico (Renato), não tive mais problemas.
Solução: Adaptar um de Tornado. O de tornado Regula a tensão entre 13~13.5 Volts, isso carrega por completo a bateria e melhora MUITO a partida da W16, é mais barato e facil de encontrar, alem do encaixe ser igual.
Para isso, comprar o regulador e o pedaço do chicote da Tornado do regulador (se não achar, um mecanico deve ter um sobrando). Ligue os 3 fios amarelos entre eles (não importa a ordem), depois vermelho com vermelho e verde com preto.
Peças Alternativas - W16
Vou postar aqui algumas peças alternativas que tenho utilizado ao longos desses anos de Cagiveiro. As peças são referentes a W16.
* Pastilha de freio dianteiro - FJ1550 (mesma das KTM, Aprilia Pegaso)
* Pastilha de freio traseiro - FJ930 (mesma da suzuki katana 125cc)
* Manete de freio - mesmo das Cagivas Elefantes750/900, Elefantrés 27.5, Cagiva Mito
* Filtro de Oleo - Valflex 170
* Filtro de Ar - Suzuki Intruder 125cc
* Cebolinha do Oleo - Fusca
* Vela - NGK D8EA (CG)
* Retentor de Bangala - 50x42x10,5
* Motor de Arranque - Adaptar peças da falcon ou CB500 (utilizar carcaça original)
* Placa de Partida - CG (utilizar os roletes somente)
* Discos de Embreagem - RD350 (achei em um forum, não sei se é verdade) ou da GS500 (tem q retrabalhar os dentes, mas o diametro é o mesmo). Os originais são MCC 204-7.
* Corrente de Comando - XT600, 660, Tenere (Elas tem 126 elos, o da W16 é 122, tem q tirar 4 elos, antes que me critiquem, é facilmente executado por um bom mecânico). 122 elos só a ZX6, as DR são 124.
* Bronzinas de Biela - Gol 1.0 8 valvulas, leve em uma retifica e veja qual usar, se standart ou com medidas maiores
* Regulador de Voltagem - Adaptar de outras motos, a minha usava de Tornado, ficou perfeito
Bem vindo
Sempre me deparei com pessoas com problemas com essas motos e é sempre dificil encontrar soluções para nossos problemas. Então decidi criar esse espaço e compartilhar minhas experiencias para ajudar os amigos proprietarios dessas motos. Fiquem a vontade para criticar, agregar informações e discutir, assim nossos problemas podem ser solucionados.

Assinar:
Comentários (Atom)